

Merging cells is by far one of the most used functions for every excel user as it allows users to give a heading to a table with multiple columns. It is a basic presentation skill that is often taught in the first lesson on Excel.
However, have you ever felt so stuck after merging cells as:
As a result, many advanced excel users avoid using this feature due to the limitations it can impose on the smooth operation of the spreadsheet program.
So, what function do advanced excel users use to avoid the limitations of merged cells?
Many advanced Excel users turn to the "Center Across Selection" function for creating visually appealing and easy-to-read presentations.
What is Centre Across Selection?
It is a cell formatting tool that allows you to align text horizontally among a group of cells, creating the visual effect of merged cells. This option works with all types of cell content, including text, numbers and formulas.
Following steps should be followed to use the Center Across Selection feature:
Step 1: Select the cells on which you want to apply the centre across selection.
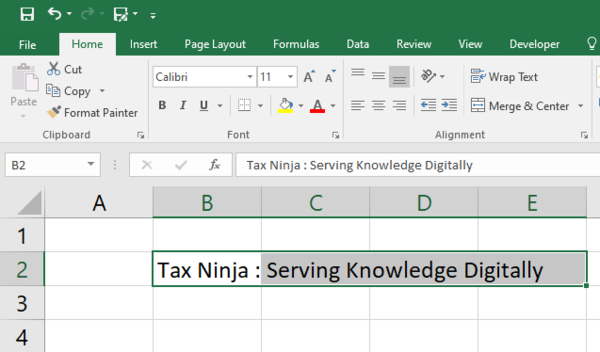
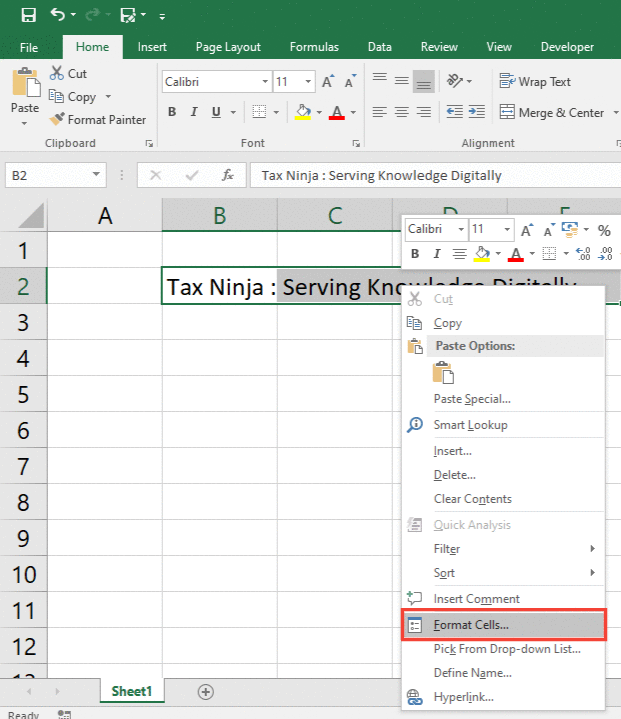
Step 2: Go to 'Format Cells,' which you can find by right-clicking the selected cell (or Home tab > Cells section > Formats > Format cells > Alignment).
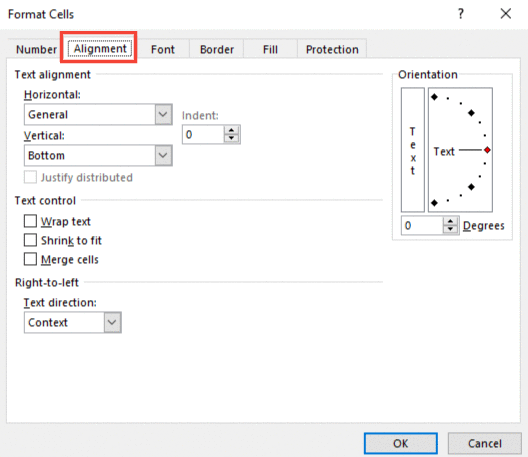
Step 3: Click the Alignment tab in the pop-up menu.
Step 4: Open the Horizontal dropdown in the Alignment tab and select the "Center Across Selection" from the drop-down options.
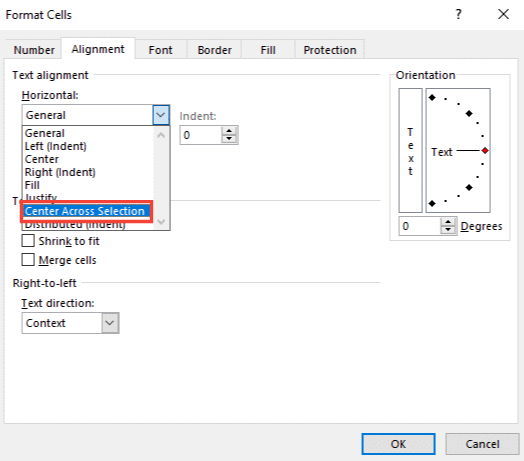
Step 5: Click the "OK" button to finalize the action and the cells will appear merged.
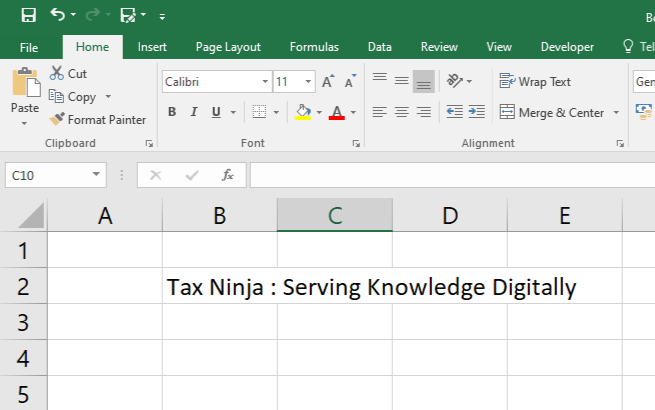
Now, any text you enter in the selected cells will be visualized as if it were typed in a single, merged cell that spans the selected cells.
One thing to keep in mind is that this feature only works with text. If you attempt to center a value or formula across multiple cells, it will not work.
It's also important to note that the "Center Across Selection" feature only works for horizontal centering.